Table of Contents
ToggleDIY Guide to Ham Radio Dummy Load: Keeping Your Signals in Check
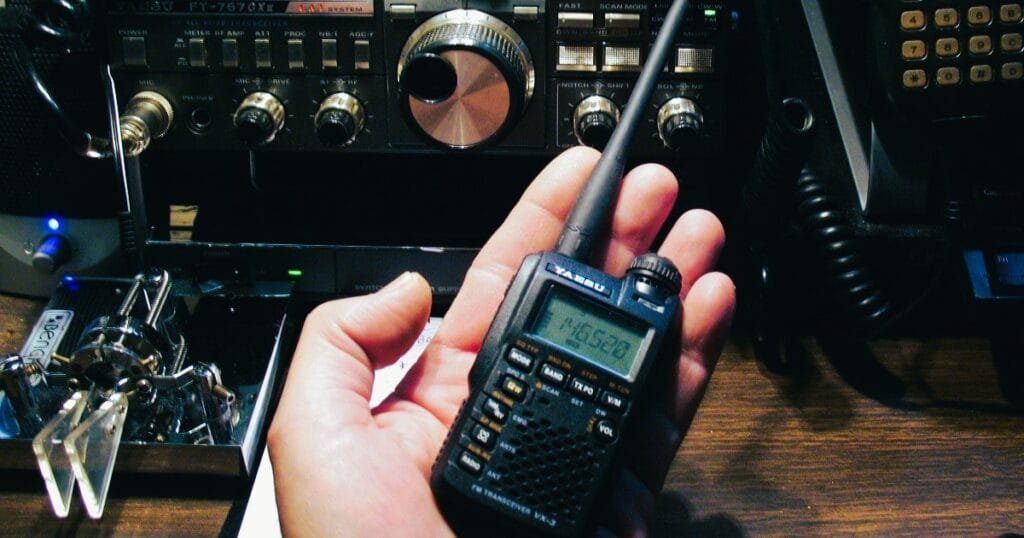
Have you ever felt the desire to test your ham radio’s full output strength but don’t want to be the man blasting unwelcome signals across the airwaves? You are not alone! That’s where the basics comes in—a small but powerful component that allows you to calibrate your system without accidentally broadcasting to your whole neighborhood. Today, we’ll look into dummy load, why they’re useful, and how you may make your own for your ham radio adventures.
What Is a Ham Radio Dummy Load?
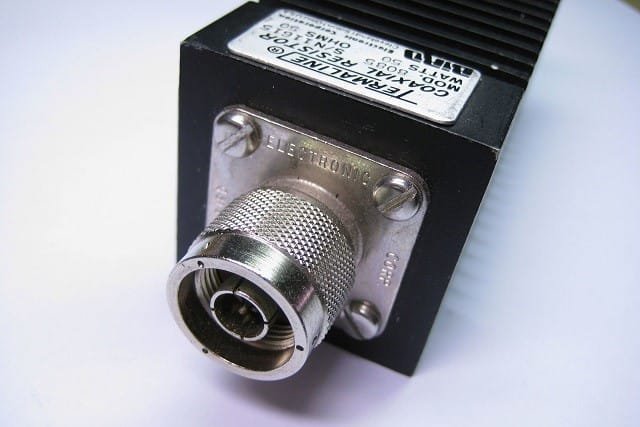
In essence, a dummy load serves as an antenna stand-in. Rather than allowing your radio signals to go over the air and potentially interfere with other stations, the dummy load absorbs all of the RF (radio frequency) energy and transforms it to heat. It’s like making your transmitter shout into a pillow—it gets the exercise it needs, but no one else has to hear it.
This useful device comprises a resistor that is designed to match the impedance of your transmitter, which is commonly 50 ohms. By imitating an antenna, the dummy load enables you to test and setup your equipment without really transmitting. This way, you won’t have to worry about treading on other operators’ toes or broadcasting on frequencies you shouldn’t be utilizing.
Why Do We Need a Dummy Load?
At this stage, you might be thinking, ‘What is the purpose of using a this?’ and, ‘Isn’t it enough to depend only on an antenna for all of my requirements?” Allow me to explain why including a dummy in your setup is crucial for all amateur radio operators:
1. Prevents Interference
When testing your transmitter or adjusting your radio, you don’t want to clog the airways with unwanted frequencies. Transmitting without an antenna, or into a badly matched one, might result in undesired interference with other ham operators. A dummy isolates your testing, ensuring that you don’t accidentally jam other stations or cause mayhem across the bands. It keeps your signals in control, allowing you to fix difficulties safely.
2. Provides a Safe Testing Environment
Without a dummy load, you risk harming your transmitter by sending data into an open circuit or, worse, breaking radio frequency laws. With one, you can test as much as you want while keeping your equipment safe and in compliance. It’s like having a safety net while fine-tuning your system, ensuring that all of your settings are perfect before going live.
3. Ensures Accurate Measurements
A high-quality load has a constant impedance of 50 ohms, which is crucial for getting accurate power output values from your transmitter. Consider using a dependable kitchen scale while baking—precision is essential. Without the right impedance match, your results may be inaccurate, resulting in potential mistakes while attempting to improve your transmission system.
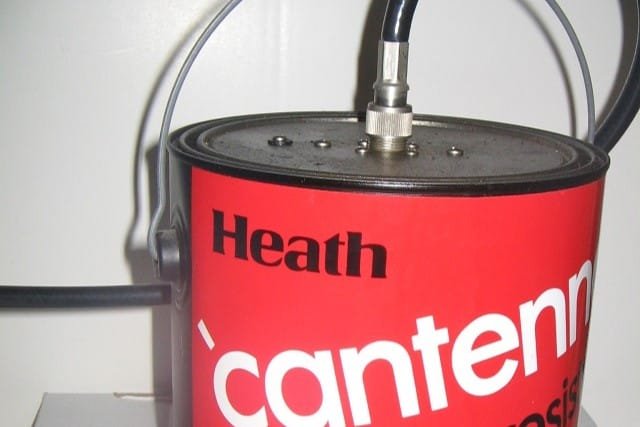
Making a Simple Load for Amateur Radio
Yeah, you could always buy a commercial dummy electrical load…but where is the fun in that? It’s a fun DIY project; you can learn more about how your equipment works by building one. Also, you built the tool so there is that feeling of completion.
Materials You’ll Need:
Non-Inductive Resistors: These resistors are intended to withstand high frequencies without producing undesirable inductance. For this project, we will connect ten 510-ohm, 2-watt resistors in parallel. This configuration can take up to 20 watts of electricity and approximates the 50-ohm impedance we want.
Heat Sink: Because resistors create heat during operation, a suitable heat sink will assist disperse that heat and save your components from burning out.
Coaxial Connector: Your dummy electrical load will connect to your transmitter via a PL-259 or similar connector. Learn more about coax connectors here.
Project Box: This will protect the load and make it easier to handle during testing.
Step-by-Step Instructions:
Step 1: Prepare the Resistors
First of all, I soldered it on the parallel 510 Ohm resistor and there were ten pieces in my case. This would make the total resistance about 51 ohms (nearly a perfect match for our desired impedance of 50-ohm). Your soldering should be neat and solid, as loose connections could lead to false readings or even device failure.
Step 2: Attach the Resistor Assembly to the Heat Sink
To guarantee proper heat transmission, mount your resistors to the heat sink with screws or thermal paste. The heat sink will assist limit the temperature rise, particularly during extended testing sessions, ensuring that everything functions properly.
Step 3: Connect the Coaxial Connector
The next step is to carefully solder the resistor assembly to your coaxial connector’s center pin and shield, ensuring a strong and stable connection for best performance. Be exact here—loose or faulty connections might result in incorrect readings or even damage to the transmitter.
Step 4: Enclose in the Project Box
Once everything has been soldered and secured, place the complete assembly in your project box. Drill holes in the coaxial connector and ventilation to allow heat to escape during usage. This protects your components from external harm while also keeping everything nice and clean.
Step 5: Test the Load
Before connecting the load to your transmitter, use an ohmmeter to measure the resistance. It should read around 50 ohms. If everything checks out, you’re ready to travel!
Using Your Dummy Load
So after you build your load, what do you use it for? This is how to set it up with your ham radio.
Connect the Load: Attach the load to your transmitter’s output port as you would an antenna.
Turn on the Transmitter: Start your setup and pick the power level at which you wish to test. Don’t worry, the dummy load is absorbing all of the RF energy, so there’s no chance of interfering with other stations.
Run Your Tests: Whether you’re monitoring output power, tweaking your settings, or debugging an issue, the dummy load will securely absorb all of the RF energy, enabling you to concentrate on the work at hand. You may take as long as you like without producing unwanted disturbance on the radio.
Key Benefits
There are several distinct advantages to building your own load. Aside from the apparent money savings, here are several major advantages:
1. Customization
You have complete control over the specifications when building your own load. Depending on your requirements, you may change the power-handling capabilities by selecting different resistor or heat sink sizes. This feature allows you to customize your dummy load to fit your individual configuration, whether you’re testing a QRP (low-power) rig or a high-power amplifier.
2. Educational Value
Learning about the complexities of electronics and radio frequency systems is one of the most satisfying aspects of becoming a ham radio operator. Building a dummy allows you to learn the practical elements of circuit design, impedance matching, and heat dissipation, all of which are useful skills that may help you better comprehend radio functioning.
3. Durability and Maintenance
By building your own load, you will understand how it is constructed and how to fix it if necessary. Commercial units, while handy, are sometimes sent in sealed enclosures that might be difficult to access and fix. A DIY dummy load allows you to simply change out components and make improvements as needed.
Advanced Dummy Load Designs
Once you’ve mastered the basic load, you can take your project to the next level by including extra features.
Power Meter Integration
Think about including a power meter to your load to track your transmitter’s output in real time. This configuration provides a more thorough testing equipment, allowing you to change power levels and settings while monitoring the results.
High-Power Handling
If you are on a 1kW transmitter that becomes even more amount of watts. To achieve this, one can either employ higher-rated resistors or a large number of parallel connected even smaller load carrying resistors. Also consider coupling to a larger heat sink or adding active cooling sources like say a little fan, will be more efficient at dissipating the generated heat and letting your dummy load work continuously in high power levels without overheating.
Wideband Dummy Loads
Most simple dummy loads are intended to perform well at specified frequencies, usually in the HF band. However, if you operate over many bands, a wideband load may be a better choice. This architecture enables efficient testing across a larger range of frequencies, including HF, VHF, and UHF. To create a wideband dummy load, you’ll need resistors with low reactance at high frequencies, as well as careful layout and component selection to ensure impedance stability across bands.
Practical Tips
While a dummy load is an excellent tool for testing and modifying your ham radio equipment, it’s critical to follow a few guidelines to maintain its life and efficiency.
Keep an Eye on Heat
As previously stated, a load works by turning RF energy into heat. Heat levels must be monitored during lengthy or high-power testing. If your resistors or heat sink get too hot to the touch, let the dummy load to cool before proceeding with any additional use. Excessive heat can deteriorate resistors or perhaps cause irreversible damage, particularly if your dummy load’s power rating is exceeded.
Regular Maintenance
And, of course your DIY load will sometimes need servicing as any other piece of equipment. Over time solder joints can weaken, resistors wear out and connections loosen. Monitor your dummy load with an ohmmeter every so often to ensure that it is still maintaining the proper resistance. It is time to test and repair the component should the resistance have been shifted away from 50 ohm.
Use It for Troubleshooting
So while a dummy load is great for measuring power output, it can also function as an early warning system should anything go wrong with your transmitter or antenna system. If you are experiencing transmission-quality issues, attaching a dummy load can be useful in isolating whether the issue lies within your radio or antenna points or somewhere up-link on your installation. This allows you to focus on troubleshooting and ironing out the transmitter bugs without any outside influence by taking your antenna out of the equation.
Stay Within Power Limits
When employing a DIY dummy load, always keep in mind the power handling capabilities of the resistors and heat sink you’ve chosen. Exceeding the recommended power may cause burned-out resistors or perhaps damage to your transmitter. If you are doubtful about the power restrictions, err on the side of caution and test at lower levels.
Commercial vs. DIY Dummy Loads: Pros and Cons
While creating your own fake load is a fun and informative endeavor, it’s important to weigh the benefits and drawbacks of DIY solutions vs commercially available alternatives.
DIY Dummy Load Pros:
More Affordable: You can save money when building your own dummy load as it costs much less than what you would have spent on purchasing a commercial one.
Personalization: Your dummy load can get customized to fit your needs; want greater power handling, or maybe an in-built power meter?
Learning: Making your own dummy load in this way, helps you to understand electronics and RF – for many hams the most enjoyable part of Amateur Radio as a hobby.
DIY Dummy electrical Load Cons:
Limited Power Handling: Unless you invest in higher-rated components, a DIY dummy load may be unable to withstand as much power as certain commercial devices.
Less Portable: Depending on your design, a handmade dummy load may be bulkier or less durable than a commercially manufactured one.
Time Investment: Building a dummy load takes time, and if you’re not comfortable soldering or dealing with electronic components, buying one may be a better option.
Commercial Dummy Load Pros:
High Power Capacity: Commercial dummy loads are frequently engineered to tolerate significantly greater power levels than DIY counterparts, making them ideal for operators utilizing high-powered amplifiers.
Plug-and-Play: Commercial dummy loads require no assembly or testing and are ready to use right out of the box.
Durability: Manufactured dummy loads are frequently designed with sturdy casings, making them more durable and portable for field application.
Commercial Dummy Load Cons:
Cost: High-quality commercial dummy loads can be costly, particularly those built for greater power levels.
Less Customization: You won’t have as much freedom to modify or improve a commercial device as you would with a DIY dummy load.
Expanding Your Radio Knowledge
In addition to building a dummy load kit, there are many other places within ham radio where DIY projects can help you increase your proficiency. There are infinite possibilities on making your own antennas, power meters and even transceivers. While the dummy load is just a tiny piece in the universe of ham radio, learning how it’s made and used will arm you to tackle larger tasks.
Furthermore, being a part of ham radio groups or online forums could be an excellent way to talk about ideas, experiences and acquire some knowledge by another hobbyist. There are a lot of great operators out there who have years of experience under their belts and many enjoyed the opportunity to share what they know when new shooters came along.
But, if you are a newcomer in the ham radio universe, read this to know exactly what walkie-talkie is and how it works.
Conclusion: Keep Your Signals in Check
A dummy load is a critical tool to test, tune and verify functionality of your equipment in the amateur radio world. In addition to monetary savings, constructing your own test load also intensifies radio operation understanding hands on.
It is a key component for the transmission integrity, it avoids the interferences and guarantees measurements as precise as possible. Whether you choose for a simple DIY model, or select the more complex design creation of an artificial antenna into your ham radio system will assist in maintaining order amongst signals and proper functioning within your equipment.
So, why not give it a try? Get your resistors, coax connection and soldering iron out — it is time to build a dummy load! One that will leave you satisfied and give many years of good use as well, much like what a ham radio should be.
Remember: Ham radio is an experimenter’s hobby, after all. Whether you are an experienced operator or a new ham, the dummy load is something that every ham should know about and appreciate for what it brings to our hobby. So step in the ring, get those hands dirty and reap all of the rewards that come with having a strong, secure and interference free transmissions tool at your disposal!